Plastisol screen printing has become a popular choice for printing designs on clothing, especially t-shirts. This technique is easy to use and delivers high-quality results, which is why so many people prefer it. What sets plastisol apart is that it’s a unique type of ink that’s different from the usual options.
One of the biggest advantages of plastisol is its durability. Even after repeated washing, the design stays vibrant and doesn’t fade or get damaged. The final prints are known for being durable, luxurious, and having a premium feel. If you're curious about how this process works, read on for a closer look.
Steps for Plastisol Screen Printing
1. Gather Your Tools and Materials
To start, it’s helpful to know that plastisol ink is a type of screen printing ink. Rubber ink is water-based, while plastisol is oil-based. Before you begin, you'll need a few key items: positive film, emulsion, a squeegee, and fabric coated with emulsion, along with the plastisol ink itself.
Plastisol screen printing ink is great for all kinds of fabrics because it's porous and easy to apply. Plus, it comes in a wide range of colors, so you can get crisp, clear prints.
Whether you need transparent, white, or dark shades, plastisol ink is ready to use straight out of the container—no mixing needed. You can pick the exact color that suits your design. If you’re in the screen printing business, it’s smart to have all the color options on hand to ensure your customers are satisfied with the final results.
One of the best things about plastisol ink is that it’s ready to go as soon as you open it. After you’re done printing, just seal the container for storage. The ink won’t clog your screen, making for a smooth and hassle-free printing process every time.
2. Apply the Emulsion
Start by spreading the emulsion evenly over the screen. You can use a spoon or a thin plastic spatula to apply it across the entire surface, leaving about 1-2 inches from the frame without any emulsion.
3. Flatten and Print
Next, use a squeegee to smooth out the emulsion so it’s evenly coated. Let it dry for a few minutes. Once it’s dry, place your design on the screen. It's best if the design is in high-resolution black and white.
Make sure the design paper is completely flat—no wrinkles, folds, or bubbles—since any of these could affect the final print.
4. Cover the Screen
Next, cover the screen, foam, and weights with black trash bags. This makes cleanup easier since you can just dispose of any leftover emulsion on the bags, keeping your workspace tidy.
5. Expose and Wash the Screen
Turn on a UV or fluorescent lamp and let it shine on the screen for about 10 minutes. After that, carefully wash the screen. The emulsion will wash away from the areas where your design is, but stay on the rest of the screen. Let the screen dry completely before moving on.
6. Seal the Open Areas
Cover the open spots on the screen to keep ink from getting onto the t-shirt, especially around the frame. Use painter’s tape for this. Also, ensure the screen is properly set up on the printing table and everything is ready to go.
7. Position the T-shirt
Place the shirt on the screen printing table, making sure it's flat and smooth with no wrinkles or bunches. This helps get a clean print. Once the shirt is properly positioned, lower the screen onto it.
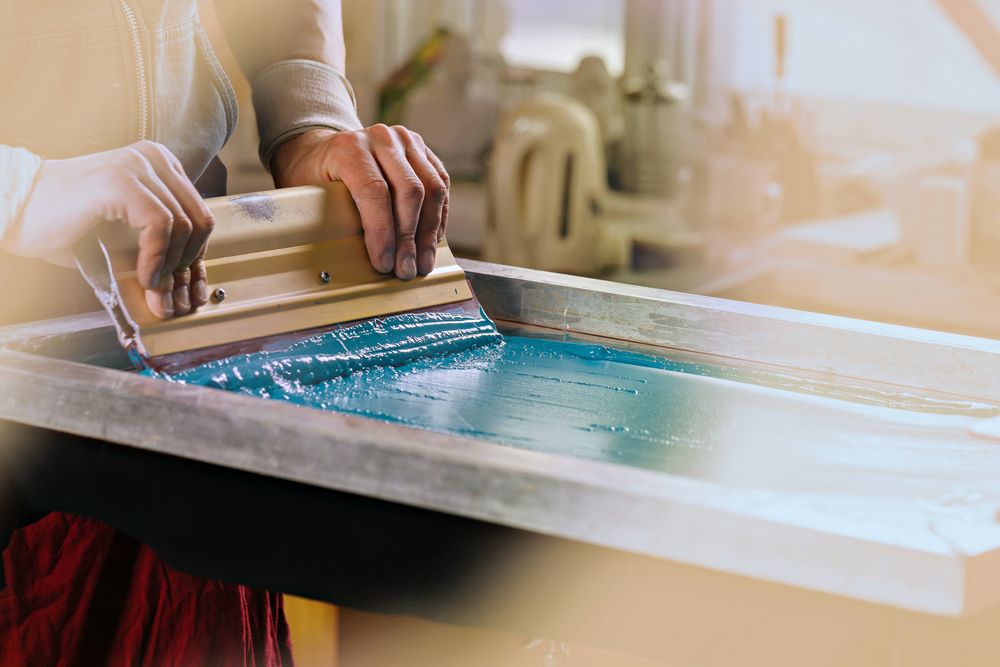
8. Apply the Ink
Spread the plastisol ink over the screen where the design is. Use a squeegee to press the ink into the design. Make sure to apply enough pressure so the ink transfers onto the t-shirt and sticks properly.
9. Heat It Up
After printing, you need to heat the plastisol ink to dry it. Use a flash dryer or heat gun and set it to about 170°C. Once it’s heated, your shirt is ready to go. Fold it neatly and package it for delivery
You’ll get a top-notch, premium-looking shirt with vibrant colors and sharp prints. The minimal cracking and accurate results make it ideal for detailed, multi-color designs. That’s why this method is so popular in screen printing shops.
This technique helps screen printing businesses meet international standards, making it a popular choice in the clothing industry. It’s not only high quality but also performs well in wet conditions and speeds up the printing process.
That’s a quick overview of the plastisol screen printing technique, which is great for clothing entrepreneurs. It offers advantages like durability, vibrant colors, and precision, even though the process can be a bit lengthy. Consider this method carefully before starting your screen printing business, and make sure you have the right tools and materials
Want to promote your brand stylishly and effectively? Screen printed t-shirts from Studiokado are a perfect choice! Our shirts combine durable printing with comfortable fabric, making them both eye-catching and comfy.
Also Read:

Rated Green Detangling Perfume Hair Mist (Peony-Coconut-Sandal)
Where Nature’s Botanicals Meet Fine Fragrance
Belle
It's a blue Tea Set, Très Belle!
The Executive For Her
When The Executive get a little sass
